Artificial intelligence is no longer just about generating text or images—it’s now stepping into the world of moving pictures. With the release of Sora 2 by OpenAI, video creation has entered a new era. This text-to-video AI tool allows you to transform plain language prompts into cinematic short clips, complete with natural physics, realistic movement, and even synced audio.
If you’ve ever wished you could direct a film without cameras, actors, or expensive gear, Sora 2 is your pocket-sized film studio. In this article, we’ll walk through everything you need to know to launch your first Sora 2 video in minutes. From installing the app and writing your first prompts to troubleshooting and exporting, you’ll discover how to go from idea to finished clip with ease.
What Makes Sora 2 Different?
While many AI video generators have emerged in recent years, most still struggle with believability. Movements can feel floaty, environments sometimes look distorted, and audio often has to be added manually afterward.
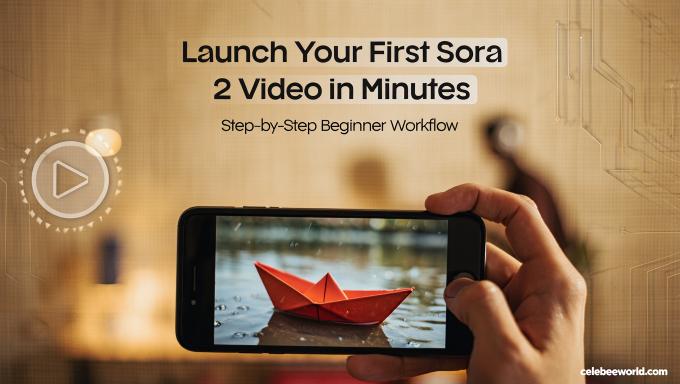
Sora 2 changes that. It has been designed to emphasize realism, physics, and control. When you describe a scene—say, “a paper boat floating across a puddle at sunset”—the app doesn’t just create visuals, it also layers in ambient sound like raindrops and city echoes. Camera choices, lighting conditions, and pacing all respond directly to your instructions.
What this means for creators is simple: you can storyboard, shoot, and finish a video directly from your iPhone, using nothing but words.
Step 1: Check Availability Before You Begin
At launch, Sora 2 is available only on iOS devices. The app is currently invite-only and rolling out region by region. If you’re in a supported country, you may be able to download the app right away and sign in with your OpenAI account. If not, don’t worry—expansion is happening quickly.
In the meantime, you can prepare. Think of ideas you’d like to bring to life, write down short scripts, and practice turning them into clear, visual prompts. When the app opens to your region, you’ll already have a head start.
Step 2: Install and Onboard
Once you confirm that Sora 2 is available on your iPhone, the setup is simple:
- Download the app from the iOS App Store.
- Log in with your OpenAI account.
- Complete the short onboarding process, which includes age verification.
- If you want to feature your likeness in any clips, you’ll need to go through an identity check.
- Enable notifications to make sure you receive updates about new features or access changes.
This whole process takes just a few minutes, and once complete, you’ll be ready to start your first project.
Step 3: Understand Safety and Responsible Use
Like any powerful creative tool, Sora 2 comes with boundaries. To ensure safe and ethical use, every exported video includes both a watermark and C2PA provenance metadata. This makes it clear that the content was AI-generated and helps maintain transparency online.
Creators should also follow a simple rule: only use people, brands, or likenesses you have consent for. Avoid risky or sensitive topics, since prompts that violate the system’s safety standards will be blocked.
Before you get started, it’s a good idea to read the official Sora 2 System Card, which outlines the app’s safety rules, restricted use cases, and current limitations.
Step 4: Write Your First Prompt
Prompt writing is the heart of using any text-to-video AI, and Sora 2 rewards clarity and specificity. Instead of vague, poetic phrases, focus on who, what, where, and how.
Here’s a simple structure to follow:
- Subject: The main character, object, or focus of the scene.
- Setting: The location, time of day, or weather.
- Action: What’s happening in the clip.
- Camera: The perspective—wide shot, close-up, dolly, or pan.
- Audio: Background sounds or simple effects.
- Style: Cinematic, documentary, animation, or another visual approach.
Example Prompt: “A red paper boat drifts across a puddle at sunset in a quiet alley, gentle forward dolly, soft rain ambience, cinematic style.”
This works beautifully because it’s grounded in concrete visuals. Instead of asking for an “emotional, dreamlike mood,” you’re giving the AI precise elements it can realistically create.
Step 5: Generate and Refine Your Clip
Your first output might not be perfect—and that’s okay. Sora 2 is designed to help you iterate quickly.
- Start by generating a preview clip.
- Adjust just one variable at a time. For example, change the camera angle, or adjust the lighting, but don’t alter everything at once.
- Use the Remix feature to branch into new versions while keeping your original safe.
- Write down what you changed and why, so you can repeat success in future clips.
A good test is this: if you can explain the difference between Version 1 and Version 2 in one sentence, you’re iterating with focus.
Step 6: Try a Small Project to Learn Faster
The best way to learn Sora 2 is not by making one clip, but by stringing together a few short ones into a story.
Here’s a project you can complete in under an hour:
Theme: Morning in a Coastal Town
- Clip A: Blue hour rooftops, camera tilts slowly to the horizon, soft morning ambience.
- Clip B: A seagull crosses the frame, lateral pan, faint wind sounds.
- Clip C: Sunlight glimmers on water, handheld camera effect, distant ocean waves.
Generate each clip, remix once for variety, and then choose the best three versions. If you like, stitch them together in a simple editor such as CapCut. The result? A polished 12–20 second montage that feels cinematic—created entirely from text.
Step 7: Troubleshoot Common Issues
Even with a smooth app like Sora 2, you might run into small challenges. Here are quick solutions:
- No invite yet? Keep your app updated and watch OpenAI announcements.
- Not in a supported region? Practice writing prompts now and save them for later.
- Prompt rejected? Replace real people with fictional characters or adjust flagged words.
- Daily usage limit hit? Start with your most important ideas before experimenting.
- Downloads failing? Update the app, connect to stable Wi-Fi, and regenerate.
By planning ahead and staying organized, you can keep momentum even when the app limits your output.
Step 8: Export and Share Responsibly
When you’re happy with your clip, export it directly from the app. The watermark and provenance metadata will remain visible, ensuring transparency wherever you share it.
If you’re posting to platforms like Instagram, TikTok, or YouTube, always credit Sora 2 by OpenAI in your caption. If you used someone’s likeness, confirm they gave consent. For your own workflow, name and organize your files clearly—something like 2025-10-Sora2-Coastal-RemixA makes it easy to track your creative process.
Why Sora 2 Is a Breakthrough for Creators
For years, text-to-video AI was an idea that felt out of reach—more novelty than practical. With Sora 2, that has changed. This isn’t just a toy; it’s a creative partner.
- Content creators can make engaging clips for social media in minutes.
- Educators can build quick explainers without cameras or editing suites.
- Marketers can storyboard ad ideas visually before committing to production.
- Aspiring filmmakers can practice camera movements, lighting, and pacing—all through prompts.
In short, Sora 2 makes video storytelling accessible to everyone, regardless of budget or technical skill.
Final Thoughts
Launching your first Sora 2 video is surprisingly easy. With just your iPhone and a clear idea, you can move from prompt to finished cinematic clip in minutes. By focusing on concrete descriptions, small creative projects, and iterative refinement, you’ll quickly gain confidence in using this text-to-video AI tool.
The world of content creation is shifting rapidly. Where once you needed cameras, actors, and software, you can now experiment, direct, and publish straight from your pocket. If you’ve been waiting for the right moment to explore AI video, Sora 2 is it.
So start simple, stay curious, and let your imagination do the directing. Your first Sora 2 video is just a few prompts away.